
Perhaps you noticed the symbol on the wall? yup, this one -

I'm not totally sure what the symbol stands for, but i'm pretty sure it's Japanese for: "I'm drawn in sharpie, so you better buy a couple gallons of Killz Stain covering paint, cuz this is gonna take 3 or 4 coats to get rid of me. (but when you say this you have to move your mouth out of sync with what you are saying to make it look like you being dubbed in english)" In any case, whatever it stands for, We didn't really want it on our Den wall. Next stop - Home Depot.

We bought a Spray can of Killz, two gallons of flat white ceiling paint, a quart of high gloss trim paint, two gallons of "Mysterious Mauve" semi gloss wall paint, one shop vac, two breathing masks, two paint rollers, two trim brushes, a spray bottle, a ladder, a scraper, a roll of contractor's paper, a bucket-o-putty, and several super cheap sheets of thin plastic painter's tarps.
When we got home we put most of it into the Den closet -

First we put the contractor's paper down in strips along the floor until it covered the whole room:

Then we covered that with the thin plastic tarps.


What we didn't do, and what you WILL do, if you ever do this, because you can now learn from our mistake is to make sure you put a plastic tarp over any doors that leave from this room into any other room of the house. We still find dust from this project in the far reaches of our house months later. Close this room off from the rest of your house like a Dexter kill room
Then I took the spray bottle and filled it with warmish water. I sprayed it onto the ceiling and let it sit for 15 minutes or so. When we do this again in the rest of the house, I will use one of those pump up yard sprayers. My hand still has nightmares of how cramped it got from squeezing that spray bottle 15 billion times. After the popcorn gets damp and sits for a bit, it scrapes off pretty easily.


I realized pretty soon, that we needed to take down the ceiling fan blades and cover the fixtures in plastic:

Where the scraping gets difficult is anywhere the ceiling is uneven or in spots where there is lots of mud under the popcorn. The thing is though, as you can see from this picture, there's mud under MOST of the popcorn!

So yay! The popcorn is all down! Hard part over! That's exactly what we thought. Here's the truth though. That was all easy compared to what came next. No one tells you about this part. I think it's because, most people go ahead and put some other texture on the ceiling. We just got done taking all that ugly texture off the ceiling though, and we wanted a smooth perfectly flat ceiling. The part that no one else seemed to mention on all the web sites I looked at and all the youtube videos I watched is that now you have to sand the whole ceiling down. As I mentioned earlier, we bought sanding pads and put on these sticks:

Twenty minutes later, we had sanded about 3 square inches of the ceiling properly and were about ready to sell the house and move back to our apartment. Do not bother with the sanding pad on a stick. The sanding pad on a stick will make you cry, and consider drinking paint.
Back to Home Depot.
We are now the proud owners of a fine little device called a 1/4' sheet sander:

I stood on a ladder with this little guy over my head and sanded the whole ceiling until the sun went down. It only weighs 3 lbs, but after several hours, it feels like it weighs 1,000 lbs. Here's the ceiling after I got it all sanded down:

Here's the floor:

Here's me:

To say this job is messy is obviously an understatement. Remember the advice I gave you earlier about closing this room off from the rest of the house - Believe it! We had the windows open, and a fan blowing out the screen door, and it looked like the dry wall apocalypse in the Den.
Next, we got to use our new handy dandy shop vac. Tami loves this. It instantly became her new favorite toy:
 |
| before the sanding dust settled |
 |
| the next day after the dust settled |
After we let the dust settle over night, it was time to paint. I think when you paint you are supposed to start at the top and work your way down. That's what we did, so hopefully we did it right. I've never actually really done this before, but I come from a long line of professional painters, so I went on instinct here.
We put our sticks to work here. We removed those lame sanding pads from the extend-o-sticks and attached the rollers. The sticks work really well for this purpose, and I highly recommend them for this.

Two coats on the ceiling of flat white, and it looks AWESOME! I'm really proud of how well this turned out. We also started out working on the Japanese symbol for indelible ink on the wall. Two coats of Killz on it were not enough. It ended up taking 4 coats I think. We taped the ceiling off and called it a night.

We still haven't resolved this issue though: The previous owners painted all over the Den door window:
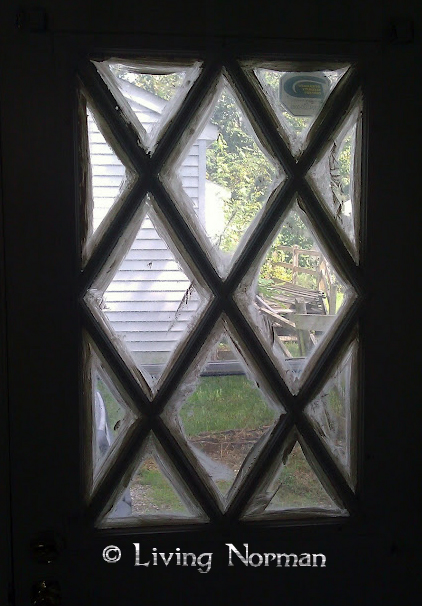
I imagine we can fix this with a razor blade, but I haven't attempted it yet. That'll be another blog post in itself most likely. By the end of day two we had the ceiling done, and the symbol all killzd. On day three we painted the walls, waited several hours, and then taped off the trim and painted the trim. Here's another place you can learn from our mistakes. I don't think there's any real good reason to tape if you are careful when you paint.
If you do tape, make sure you wait over night for the paint to really fully dry before taping over it, and then remove it the minute you are done with it. We put the tape on too soon, and then left it on for a couple days before pulling it off. It totally pulled paint off and we had to do a whole bunch of touch up painting after pulling the tape off. Here's a pic of the final product. We totally love it!

The next project in this room is going to be crown molding. That should be fun :) Hehe, I just noticed Mia is in this picture. cute!
Live Well...Live Norman
P
Well, It's about time you posted this! It was quite entertaining, and educational as well. Loved the picture of you covered in popcorn dust. How long were you in the shower before you felt clean again? Looking forward to reading more...
ReplyDelete